How to create and modify row perspectives
A row perspective can display health state, performance metrics and other information for each resource. They work in a similar way to dashboard perspectives in that they are stored in dashboard packs, they use a match criteria that defines which resource they apply to, and they have a rank that specifies which row perspective should be displayed when multiple row perspectives match. A row perspective is made up of 'cell tiles' of various types, such as Status, Sparkline, Bar, Health State History etc.
Row perspectives are used by the Matrix tile, Surface tile and Status Donut drill down pages.
You may like to watch the SquaredUp DS webinar - Matrix Tile Deep Dive.
We recommend you don't edit the provided SquaredUp DS row perspectives. A good way to start is by copying the JSON from an existing row perspective and amending as you require.
Where row perspectives are used
Row perspectives in the Matrix tile
Walkthrough: Creating a row perspective
Where row perspectives are used
A row perspective defines the data to be shown, as seen here on the Matrix tile:

Row perspectives in the Matrix tile
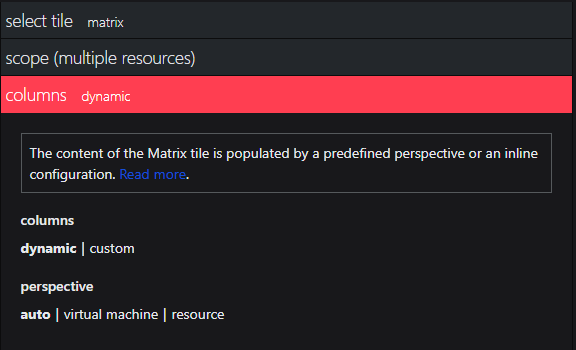
When configuring the Matrix tile (How to use the Matrix tile) you can choose which row perspective to use in the columns section. When dynamic is selected you can either leave the setting as auto which will automatically use the row perspective with the highest rank, or you can click on the row perspective you want to use. The walkthrough below describes how to add a new row perspective to appear on this list.
Walkthrough: Creating a row perspective
New row perspectives can be created on the SquaredUp server by creating a new a row perspective JSON file. A good way to start is by copying the JSON from an existing perspective and amending as you require. You must change the "id" for a unique GUID, and you may need to change the provider, as this is the match criteria used to decide where this row perspective will be used.
- Log on to the SquaredUp server and run Notepad as an administrator.
- Create a JSON file in the following path in your SquaredUp DS folder:
\User\Packages\Everyone\perspectives\rowsName of the SquaredUp folder
Location of the SquaredUp folder
If you deployed SquaredUp DS via the Azure Marketplace:
The default location for the SquaredUp folder is
F:\.SquaredUpv[Version Number]
For v5 it isF:\SquaredUpv5and for v4F:\SquaredUpv4.If you installed SquaredUp DS using the installer:
A custom location may have been chosen during the installation.
The default location for the SquaredUp folder is
C:\inetpub\wwwroot\SquaredUpFor v5 it is
C:\inetpub\wwwroot\SquaredUpv5and for v4C:\inetpub\wwwroot\SquaredUpv4. - Below is the JSON configuration template for a row perspective. You can copy this into the JSON file you have created.
{ "format": "row", "id": "NEWGUID", "match": { "provider": "PROVIDER", "type": "azure/resource" }, "name": "My new row perspective", "rank": 40, "columns": [ { "_type": "celltile/azure-status-block", "config": { "display": { "fullWidth": true } }, "title": "Status" }, { "_type": "celltile/text", "config": { "display": { "contentTemplate": "{{resourceGroup}} | {{location}}" } }, "title": "Resource Group & Location" }, { "_type": "celltile/azure-cost", "config": { "source": { "timeframe": { "range": "last30days", "type": "fixed" } } }, "title": "Cost (30 Days)" }, { "_type": "celltile/text", "config": { "display": { "contentTemplate": "{{properties.hardwareProfile.vmSize}}" } }, "title": "SKU" }, { "_type": "celltile/text", "config": { "display": { "contentTemplate": "{{#if properties.storageProfile.imageReference}}{{properties.storageProfile.imageReference.offer}} {{properties.storageProfile.imageReference.sku}}{{else}}{{properties.storageProfile.osDisk.osType}}{{/if}}" } }, "title": "Template" }, { "_type": "celltile/azure-sparkline", "config": { "source": { "metric": "Percentage CPU" } }, "title": "CPU" }, { "_type": "celltile/azure-sparkline", "config": { "display": { "labelTemplate": "{{ ( value ? Math.round(value) + '/sec' : '0/sec' ) }}" }, "source": { "metric": "Disk Read Operations/sec" } }, "title": "Disk Read Operations" }, { "_type": "celltile/azure-sparkline", "config": { "display": { "labelTemplate": "{{ ( value ? Math.round(value) + '/sec' : '0/sec' ) }}" }, "source": { "metric": "Disk Write Operations/sec" } }, "title": "Disk Write Operations" }, { "_type": "celltile/azure-sparkline", "config": { "display": { "labelTemplate": "{{value ? (value/1024).toFixed(2) + 'KB' : '0KB'}}" }, "source": { "metric": "Network In" } }, "title": "Network In" }, { "_type": "celltile/azure-sparkline", "config": { "display": { "labelTemplate": "{{value ? (value/1024).toFixed(2) + 'KB' : '0KB'}}" }, "source": { "metric": "Network Out" } }, "title": "Network Out" } ], } - Each row perspective JSON file must use a unique "id". Create a new GUID ready to use for the row perspective. You can do this simply by typing
new-guidinto PowerShell. - Replace NEWGUID with the new GUID you have created.
- Find the provider details you need for the match criteria. For example, if you have scoped a tile to virtual machines you can look at the source and copy the provider details from there:
When viewing a tile with the required scope click the edit JSON button: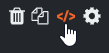
Copy the provider line: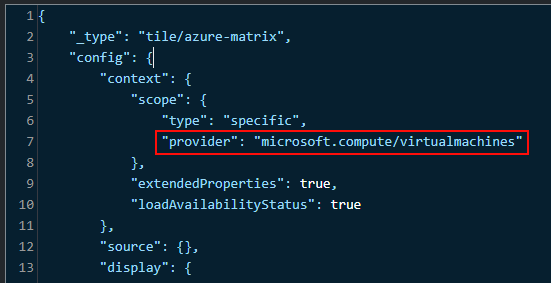
- Replace PROVIDER with the provider you want this row perspective to be displayed for.
For example:"match": { "provider": "microsoft.compute/virtualmachines", "type": "azure/resource" }, - Save your new JSON file.
- In SquaredUp DS click on the top right-hand menu ☰ > system > dashboards then click the reload button at the bottom of the page.
- Create or edit a Matrix tile scoped to the group or class specified in your row perspective. See How to use the Matrix tile.
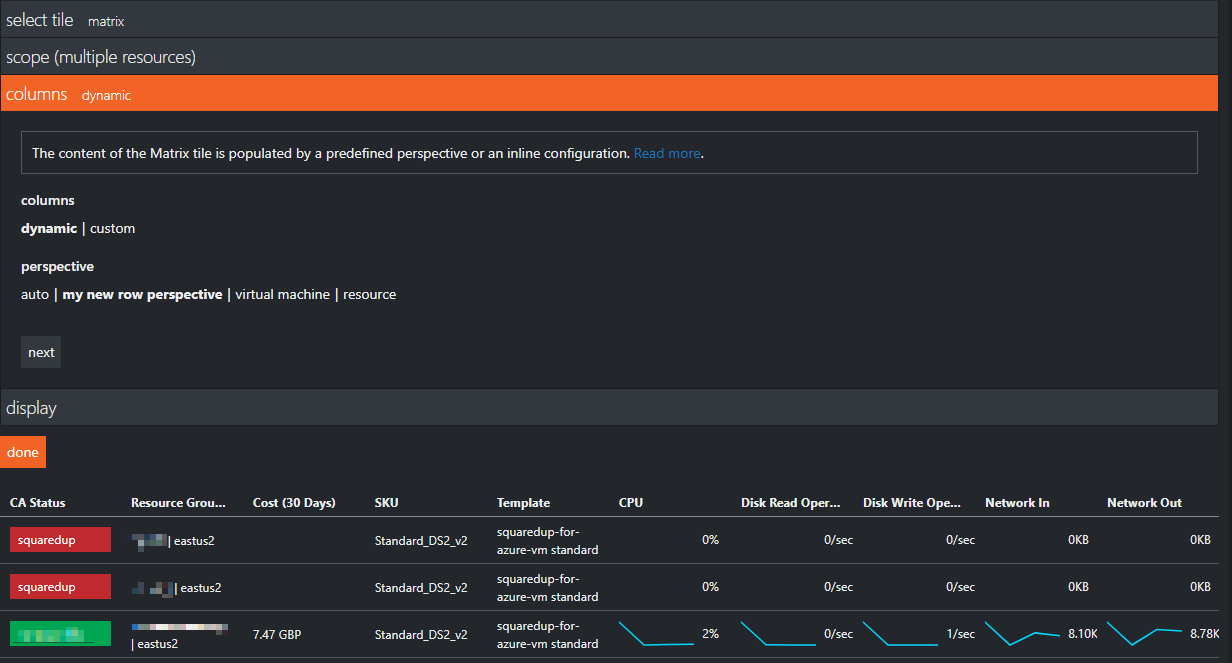
- In the columns section your new row perspective should be available for you to select. It is the name you put in the _comment that is displayed here.
- You can now edit the row perspective JSON file and re-save as required. See the Reference section at the end of this article and the Matrix tile article (How to use the Matrix tile) for more information about the cell tile options available.
FAQs
How can I edit the drill down page for a Status Resources Donut?
When drilling down on a Donut tile you will see a Matrix tile view. This view uses the highest ranked row perspective defined for the Donut tile scope.
Can I edit the existing row perspectives?
We recommend you don't edit the SquaredUp DS perspectives. Instead copy an existing row perspective JSON file and edit as you require. Don't forget to replace the "id" with a new GUID. You can create a new GUID simply by typing new-guid into PowerShell.
Reference
_comment | Provide a unique name which will be seen in the list of row perspectives to choose from when configuring a Matrix tile. |
id | Provide a GUID that should be unique to this row perspective. You can generate a new GUID by typing new-guid into PowerShell or online here. You should create a new GUID for each row perspective. Altering the existing GUID randomly will not work. |
format | row (This property differentiates a row perspective from a regular perspective) |
type | azure/resource |
provider | The provider of the resource that the perspective should apply to |
name | Unique name for the row perspective |
rank | Rank specifies which perspective should be displayed when more than one perspective matches the scoped criteria. 0 is the lowest rank and will be considered the lowest priority. Best practice is to assign numbers with sufficient gap between them (like multiples of 10) so that you can later insert other perspectives of lower ranks in between if you wish to. |
columns | Column is an array of cell tile definitions. You need to define cell tiles in the column block. For more information see How to use the Matrix tile |